Our theme includes built-in support for the LatePoint Appointment plugin. By default, it comes with the free version, which provides all the essential booking features. For advanced functionality, LatePoint also offers premium add-ons available through their paid plan.
In this guide, we’ll walk through setting up the plugin with a demonstration service. Before continuing, please ensure that the LatePoint plugin is installed and activated. If it isn’t, you can install it by navigating to Appearance → Install Plugins in your WordPress dashboard.
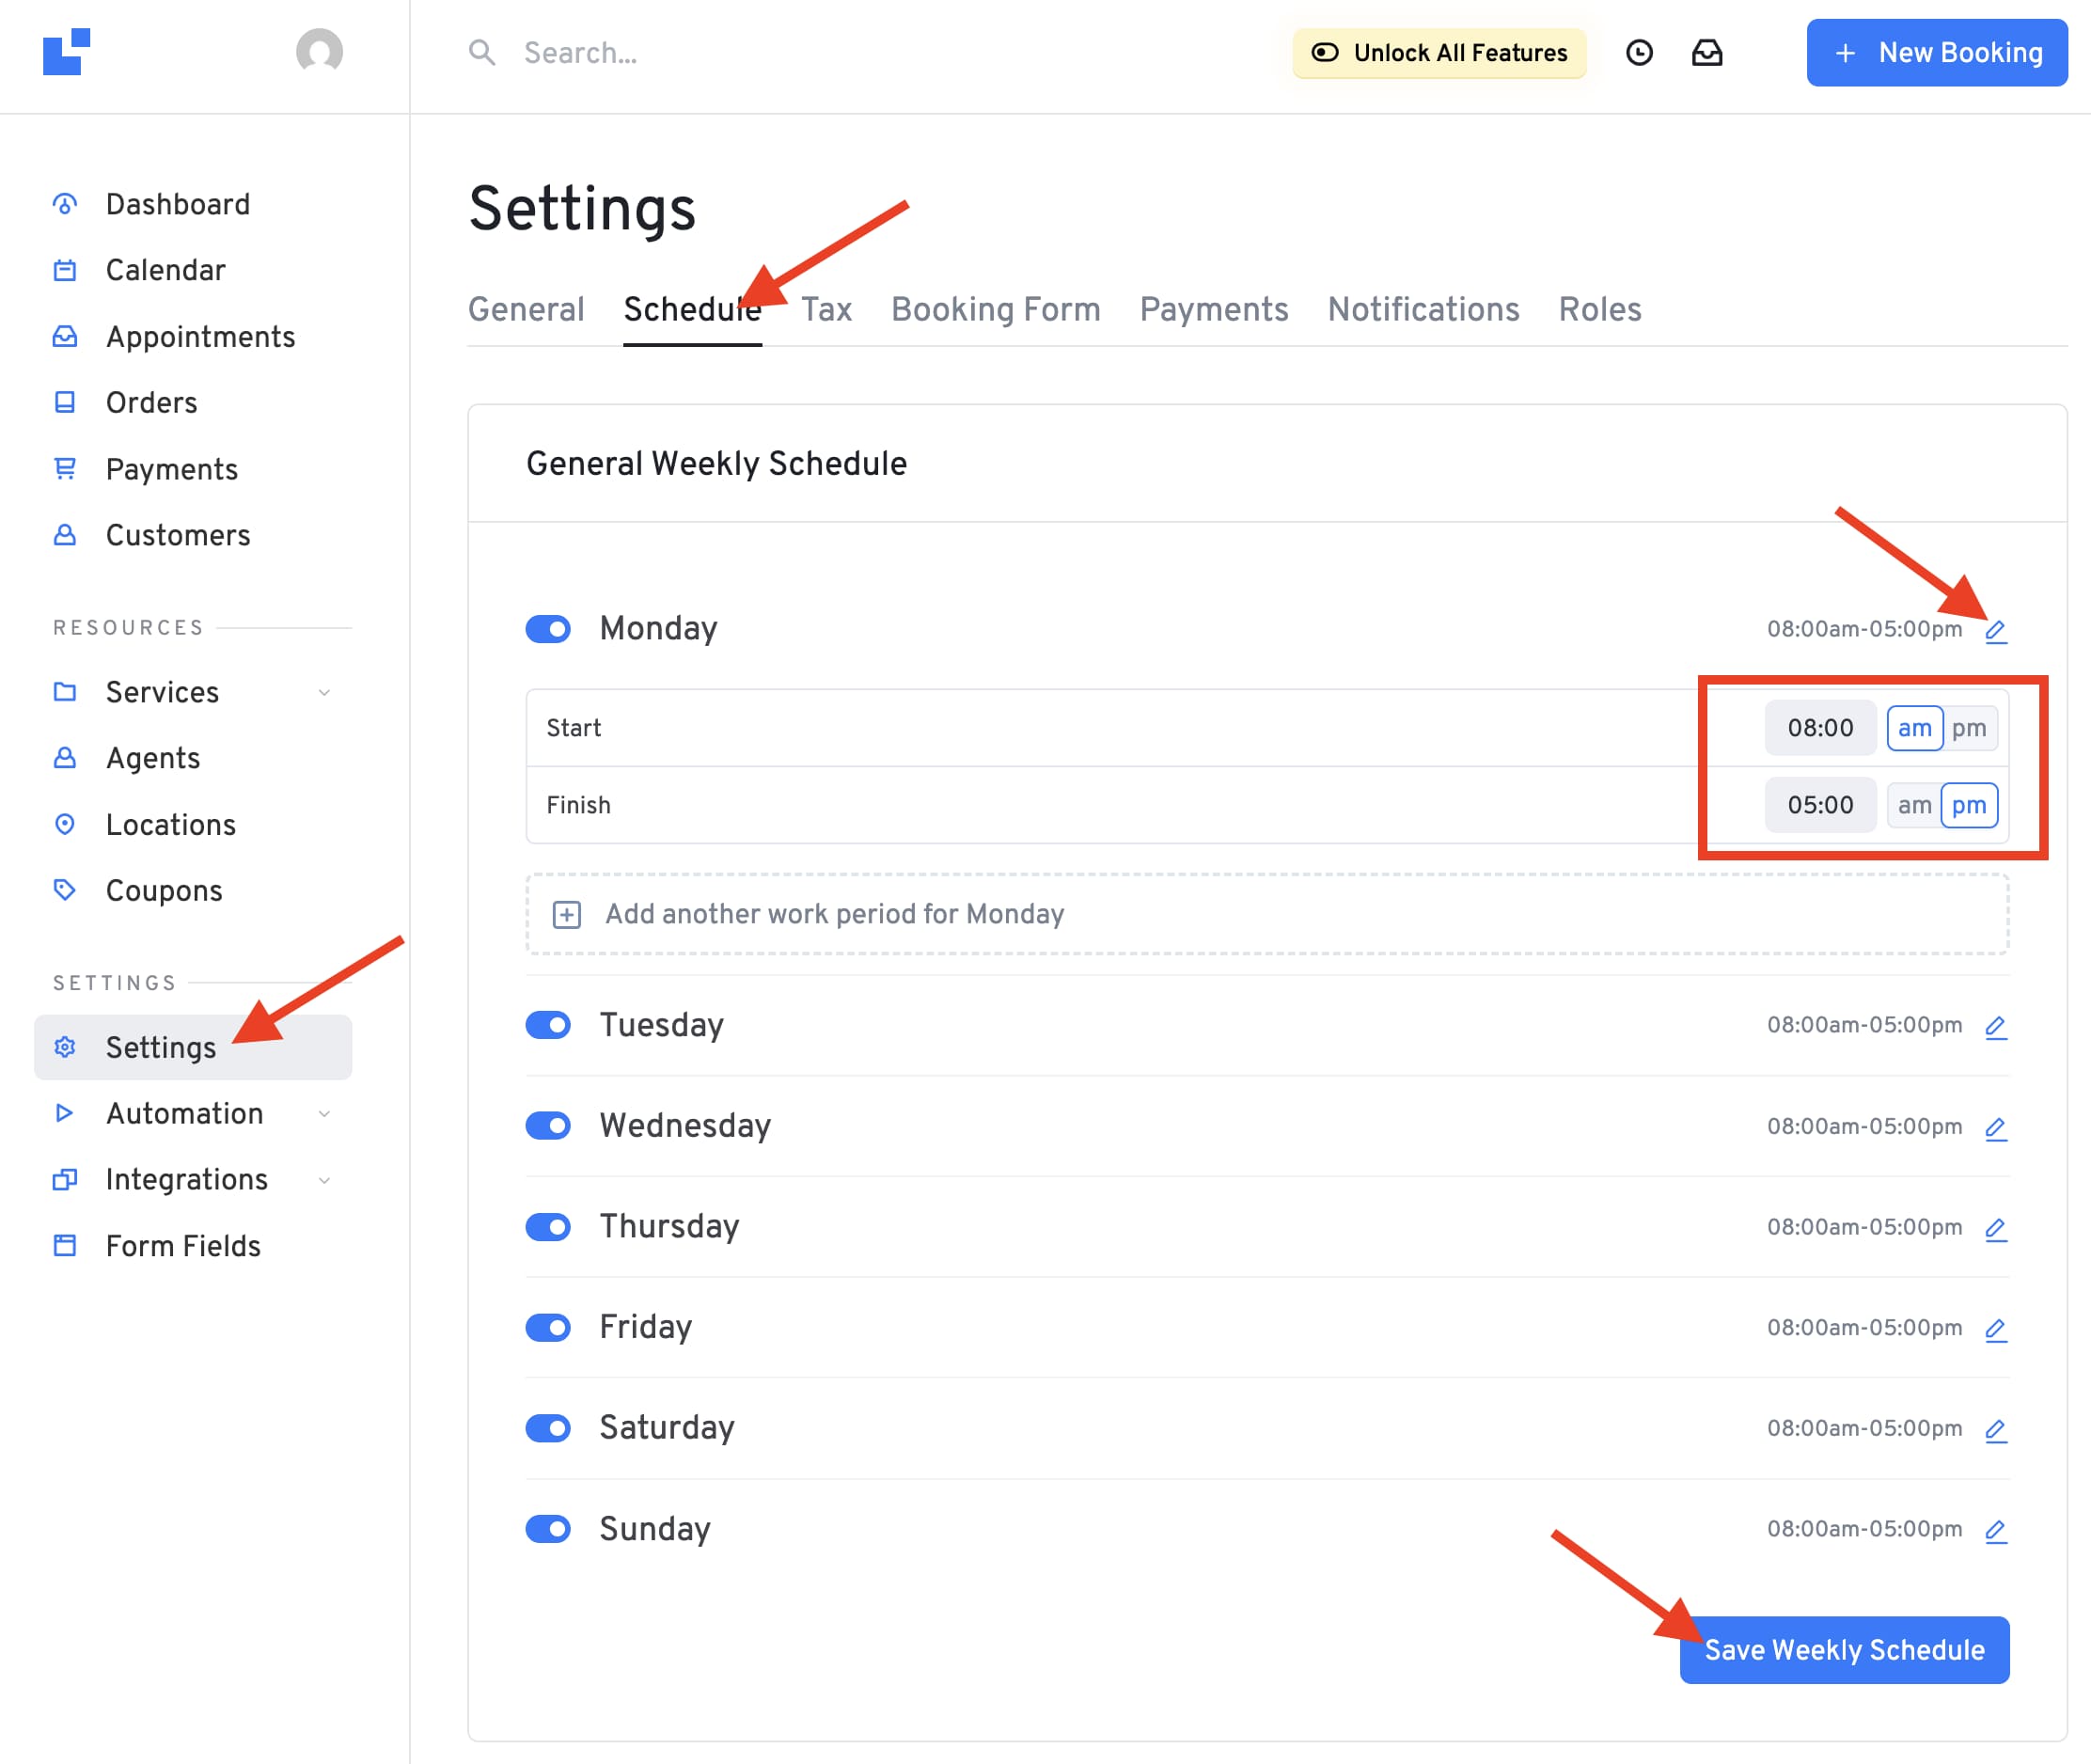
Setting your opening hours
- Click the “LatePoint” tab in your WordPress dashboard, the plugin dashboard will open.
- Go to Settings → Schedule and here you can set your opening hours.
Adding a bookable service
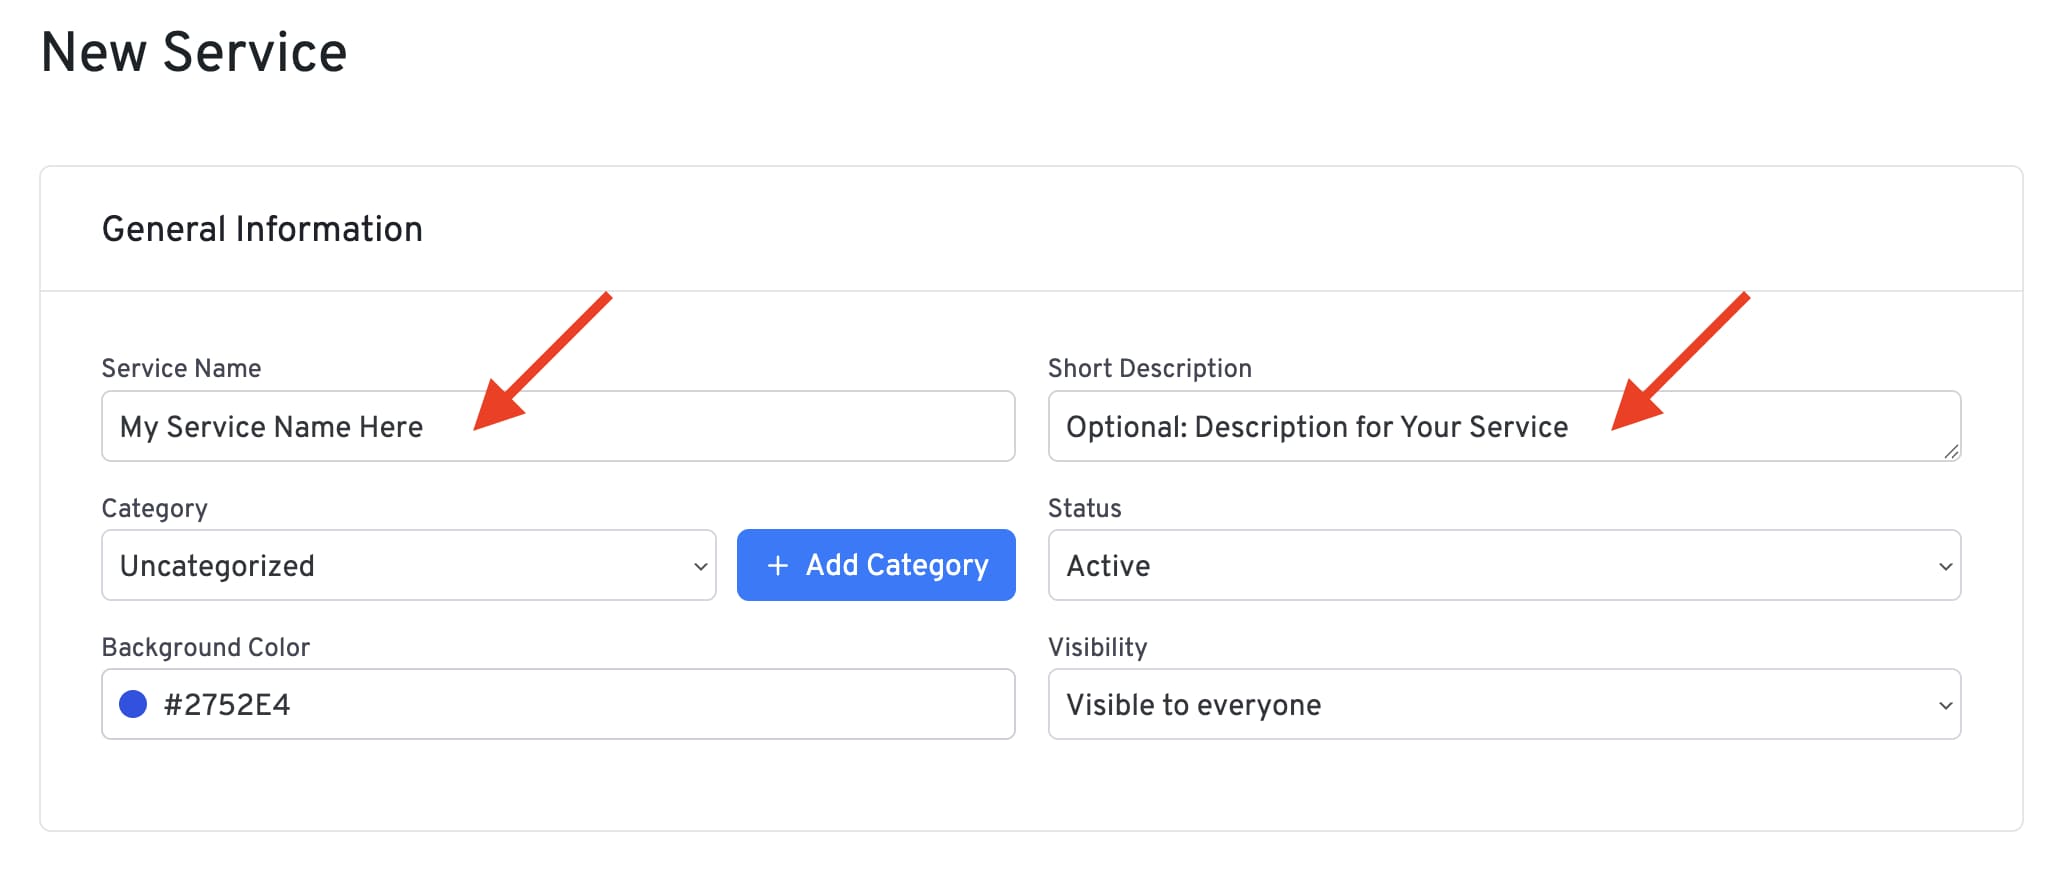
- Click the “Services” tab.
- Click the “Add Service” button.
- Enter the name for your service at the “Service Name” field.
- Optional: Add a description text for your service at the “Short Description” field.
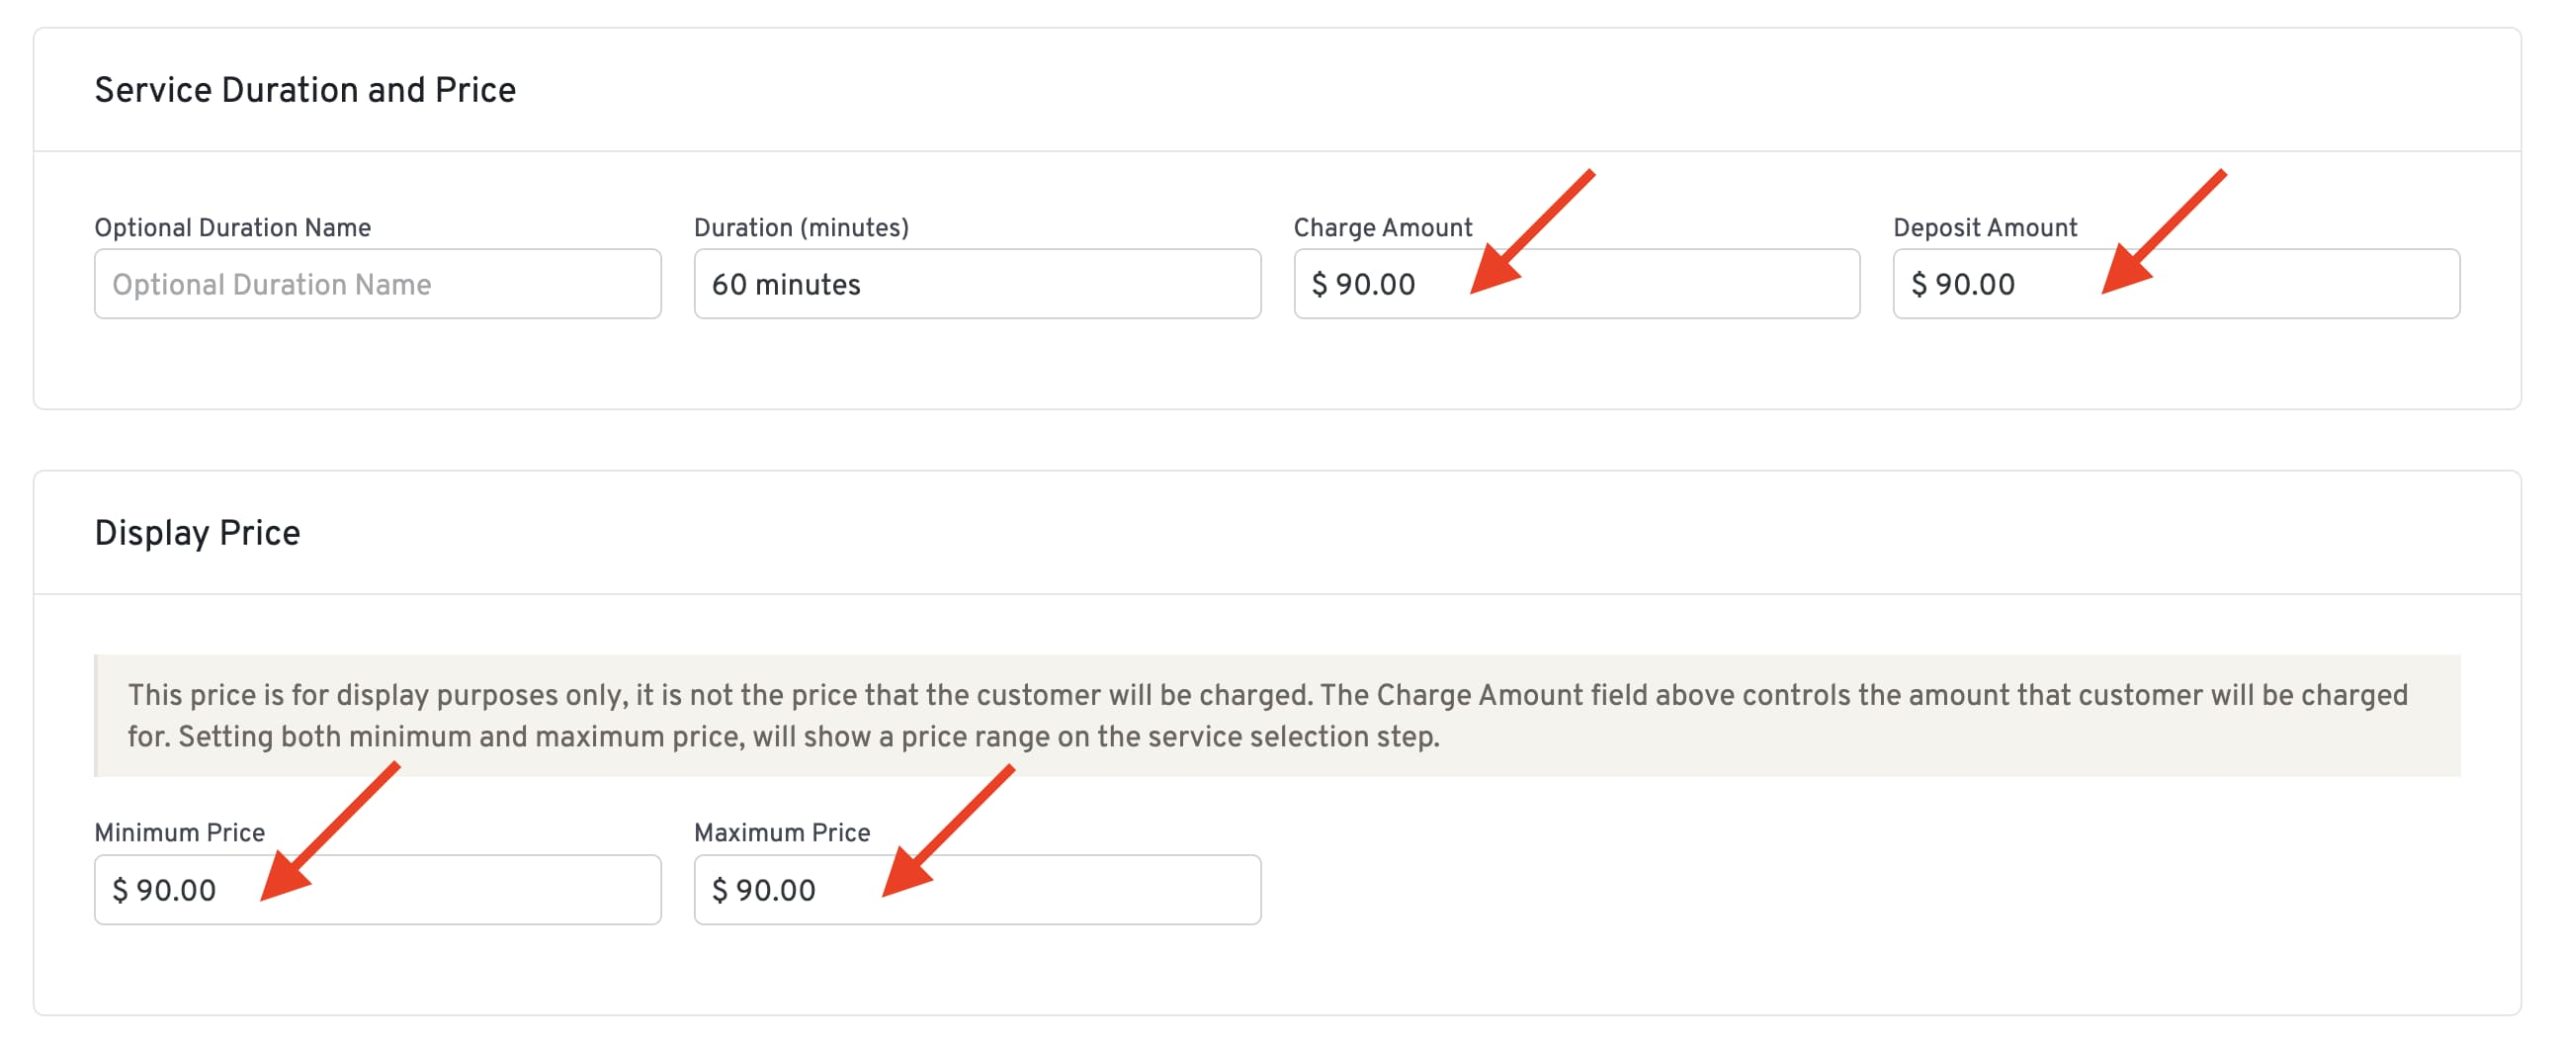
If you prefer not to set a price for your service, simply scroll to the bottom of the page and click the Save Changes button.
If you’d like to set pricing, scroll down to the “Service Duration and Price” section. For example, if you want to charge $90 for this service, enter the details as shown below:
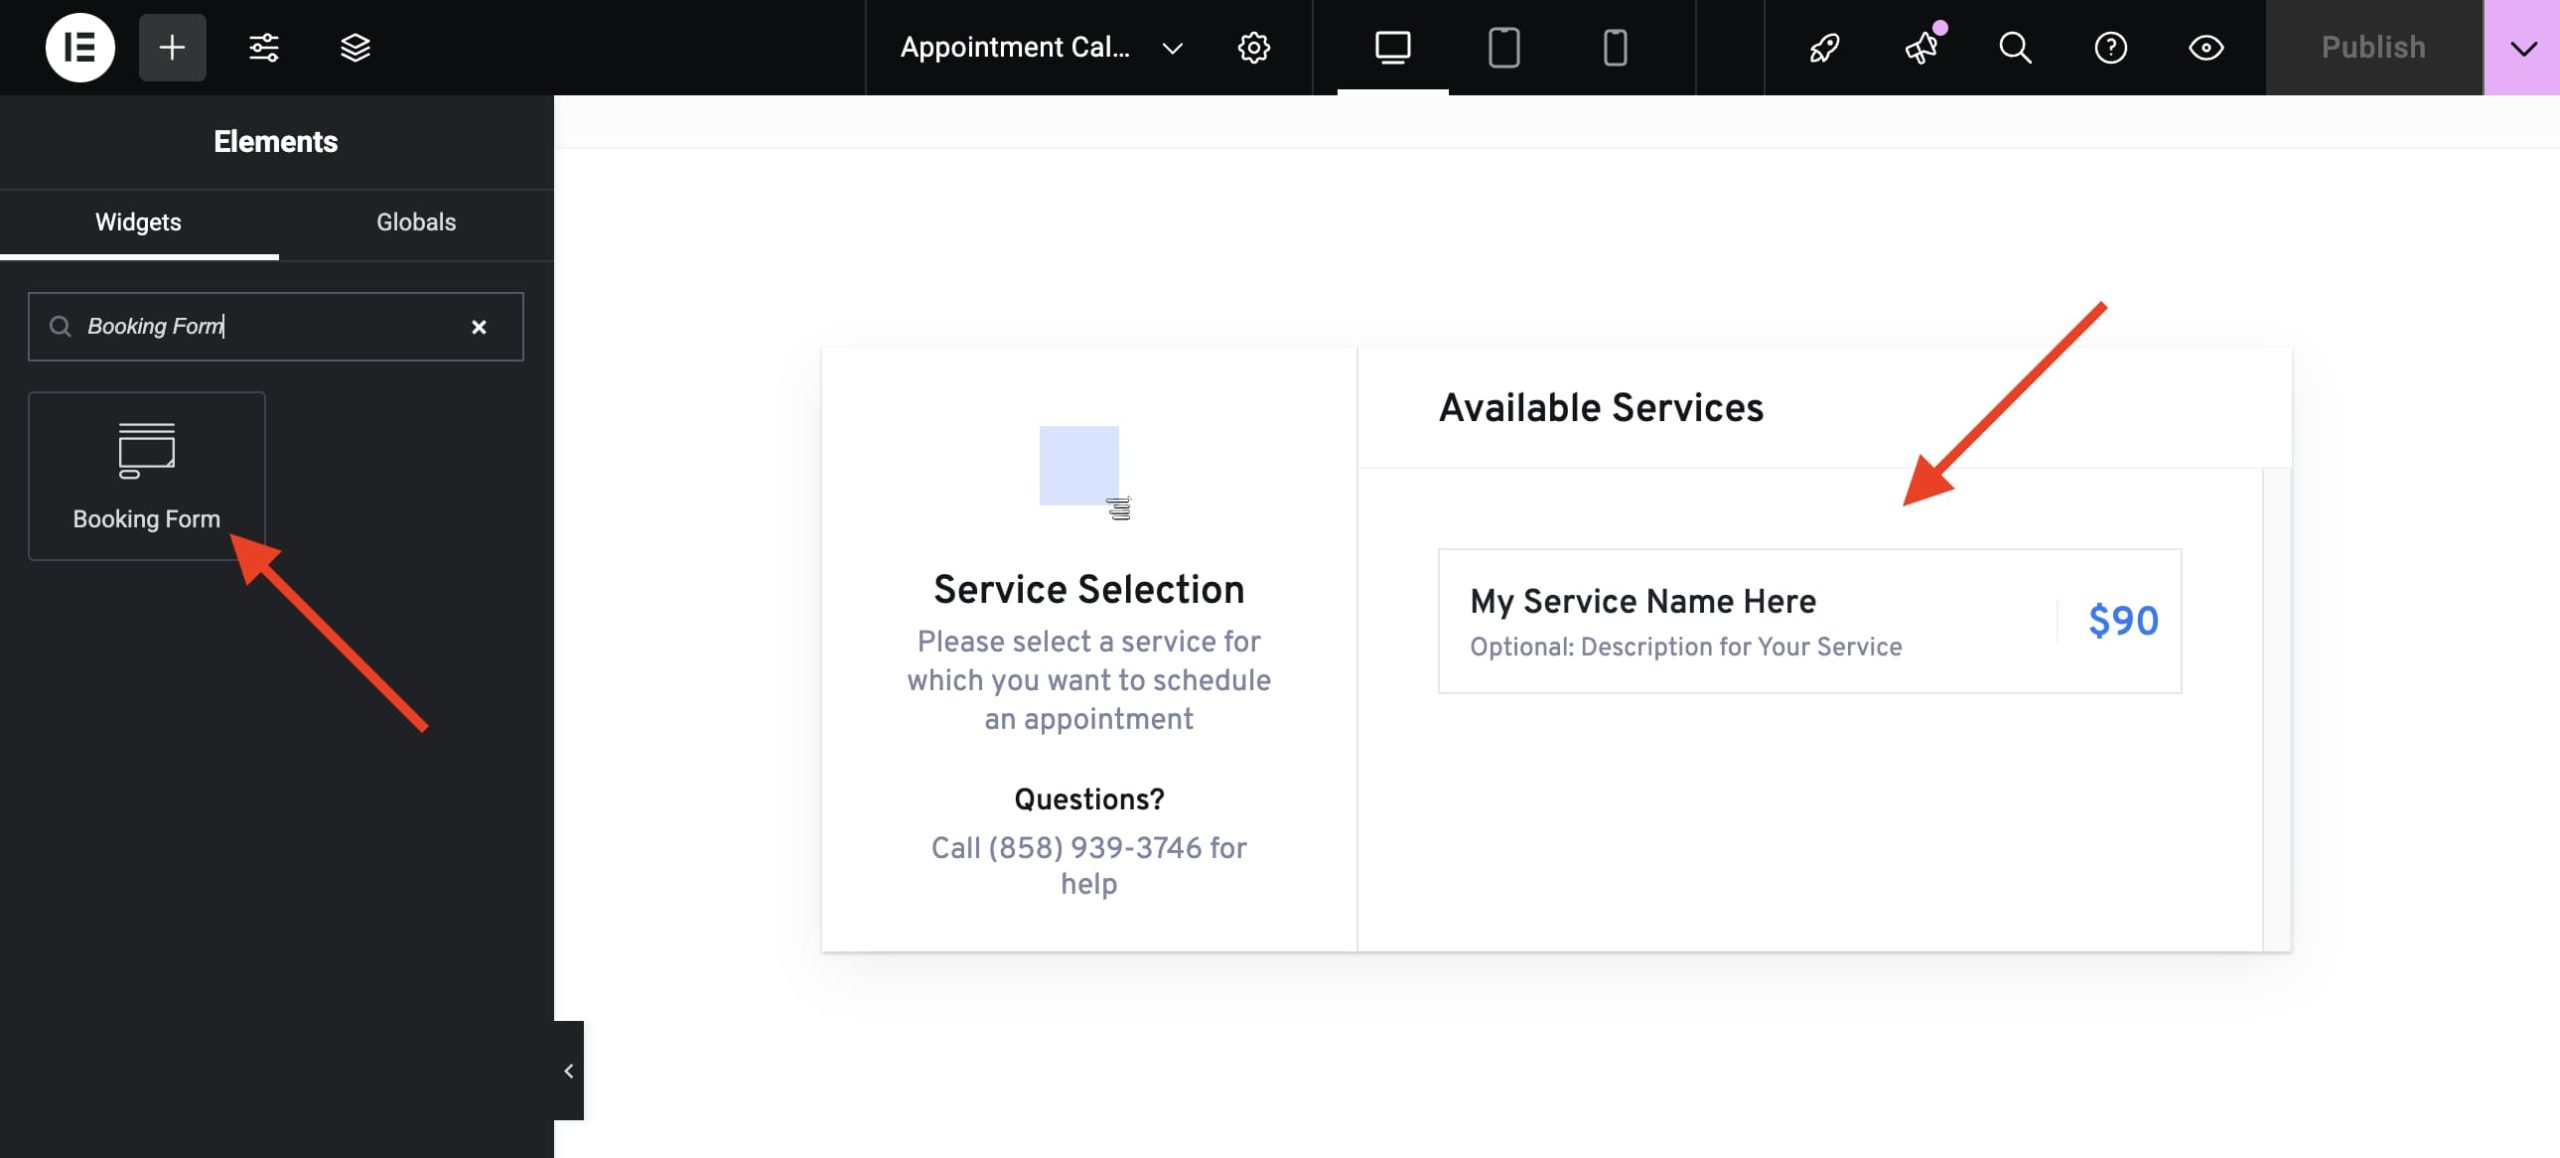
Showing the booking form on your site
If you used the demo import, you already have an “Appointment Calendar” page set up. Just head to Pages in your WordPress dashboard and edit that page.
If you didn’t use the demo import, no problem, open any page in Elementor, drag in the “Booking Form” widget, and your booking form will be ready to go.