1. Create a gallery post

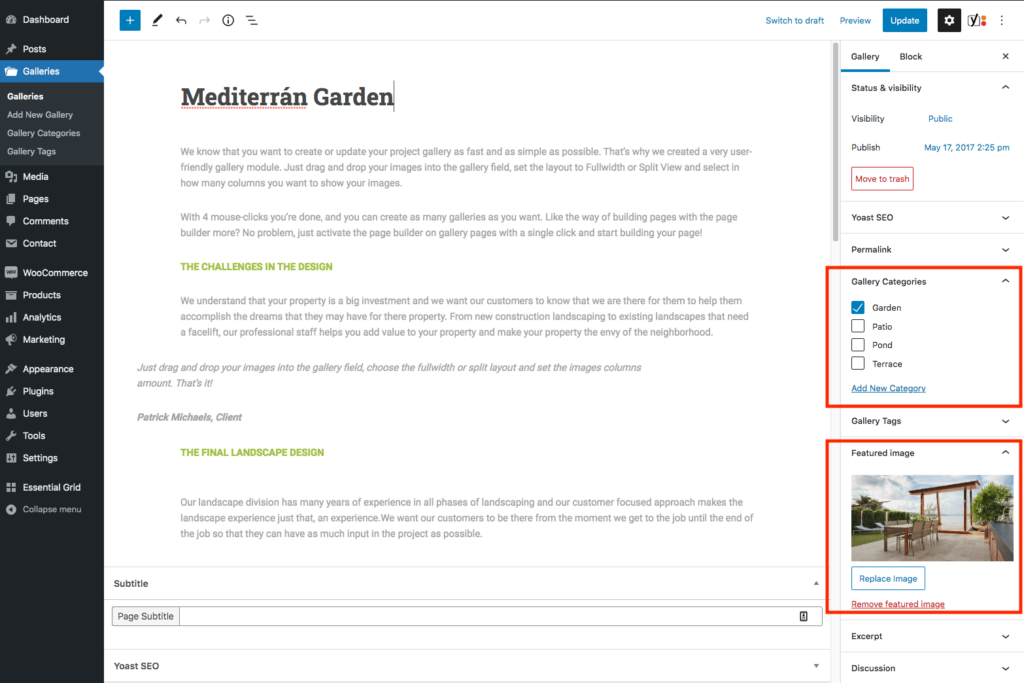
- Go to the “Gallery” admin tab and click on the “Add New Gallery” button
- Make sure the post have a title, featured image and at least one Gallery Category
- At the “Gallery Images” field add your project images for this post
- Save the post
2. Assign post to the grid

- Go to the “Essential Grid” admin tab
- Edit one of the 4 gallery grids by clicking the “Settings” button
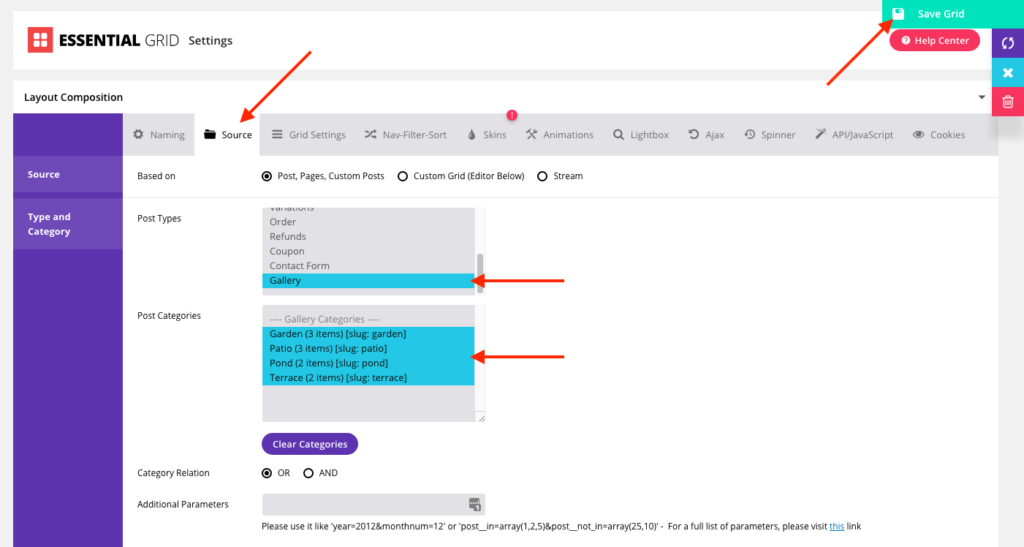
- Click the “Source Tab” at the top
- Set the “Post Type” setting to Gallery
- At the “Category” setting select your Gallery Categories (hold ctrl button to select multiple)
- Save the settings with the green floppy disk button in the top right corner of the screen
3. Show grid on a page
- Go to the “Pages” admin tab and edit a page
- Add the “Essential Grid” widget to the page builder
- Edit the widget and from the select field choose the grid you just configured
- Save the page
